
Wild West Windows: DIY Valances!
We named my son after the great pioneer, trapper, and mountain man, Jim Bridger, so a cowboy themed nursery only seemed appropriate. I've always been known for riding off into the sunset with a theme (and wordplay, for that matter), and being pregnant during the quarantine only amplified those tendencies. The numerous nursery DIY projects kept me sane in the shut-down and these window valances were one of my favorite of all the projects -- and they are far easier to make than you might think! I've detailed out all the simple steps and you can find a full supply list with links included at the bottom of the blog as well. If you'd like, you can view the full nursery gallery here as well.

Before we begin, the age old question-- MDF or plywood? I’ll leave it to Bob Villa to explain the differences between the two. We chose MDF as it was much cheaper at that time given the COVID wood price spikes and supply constraints.
Measure Up: You'll need to base your measurements around your window frame size. My window frame is 46 inches horizontally x 65 inches vertically x 2 inches deep, so we cut our MDF to be 51 inches horizontally x 20 inches vertically. Our side panels measure 3.5 inch wide x 20 inches vertically. I've included three pictures below to help detail out the measurements.
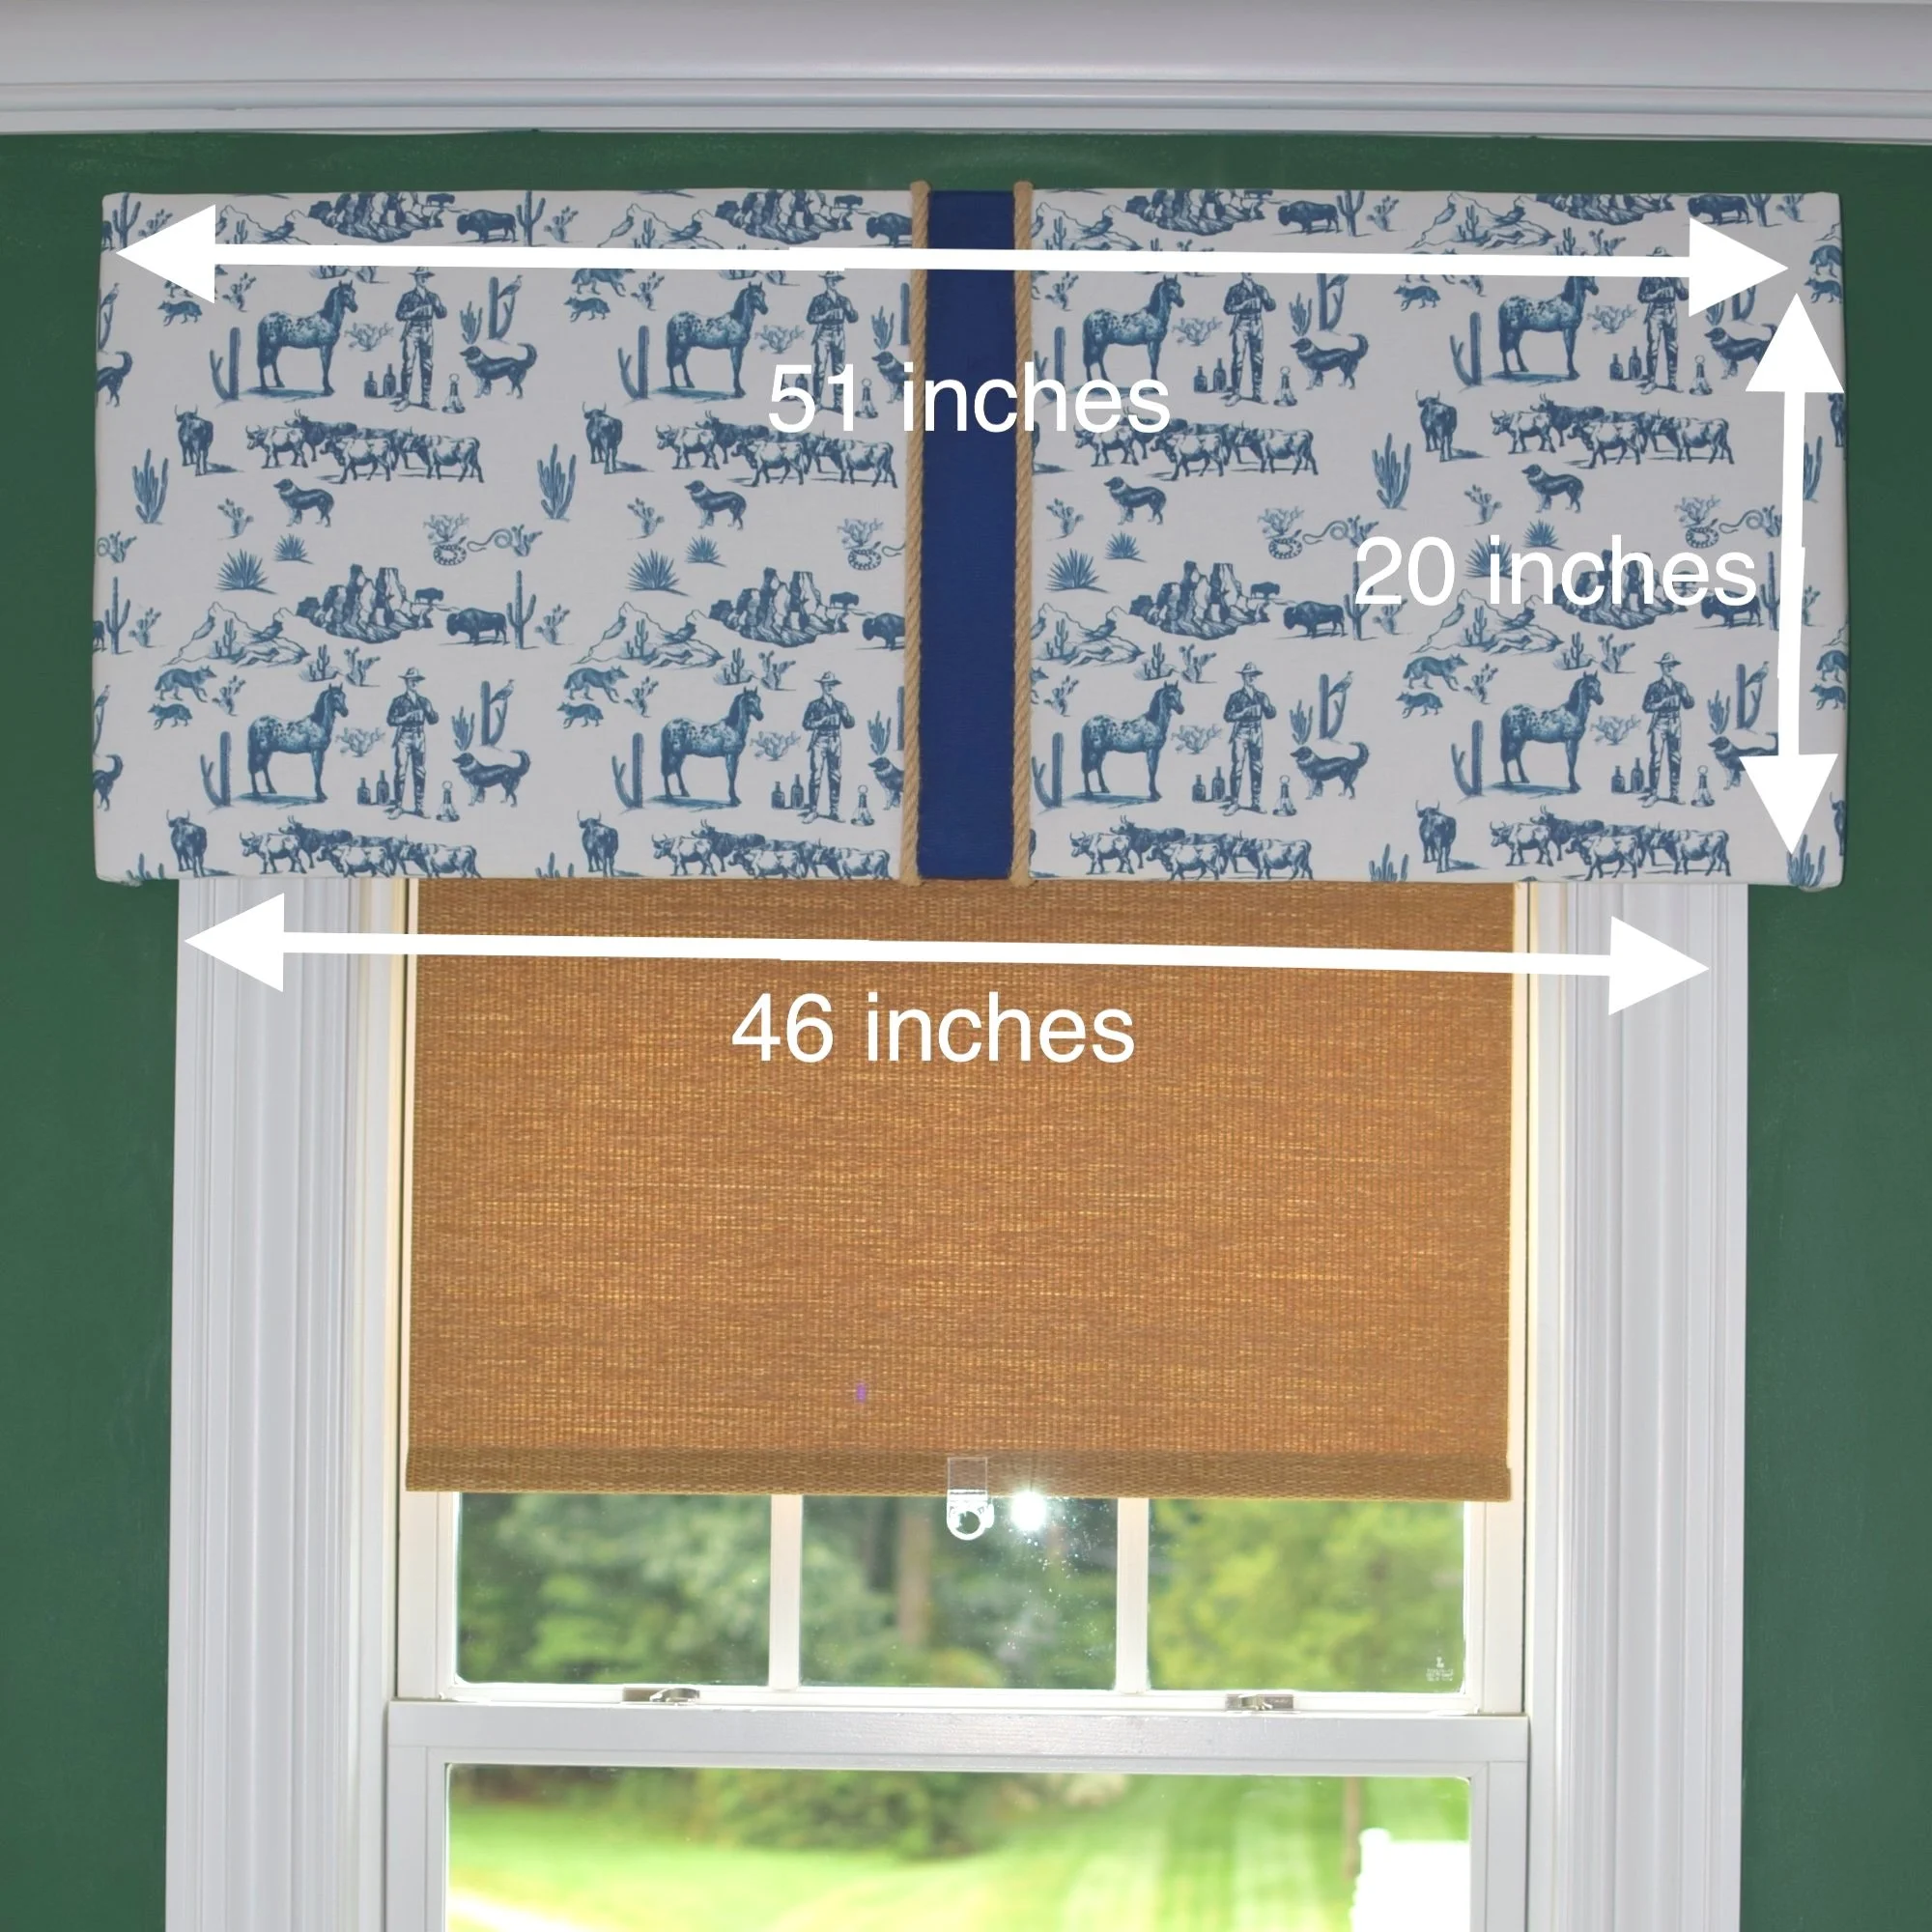


Horizontal Measurement: I recommend a 2.5 inch clearance on either side of the window frame, so add 5 inches to the measurement of your window frame to get your horizontal measurement. I have a 46 inch window frame so +5 inches = 51 inch horizontal measurement.
Vertical Measurement: You have a bit of flexibility on this measurement and it will depend on what kind of aesthetic you want to achieve. Since I have large windows, I wanted a nice big rectangle instead of a more narrow panel, but I also didn't want to block out too much light or obstruct the view out the window. Keep in mind that you will be hanging the valance above the window frame, so you'll need to account for that as you decide. I went with 20 inch vertical measurement for my valance, and we hung it on a french cleat that is 7 inches above the window frame. The french cleat on my valance is 4 inches from the top, so it ended up that my valance only covers 9 inches of my window. Since I have thick window frames, the valance primarily covers the frame and less so the actual glass window. All to say, that although I went with a big 20inch vertical measurement, I hung it high above the window so it wouldn't obstruct the view or the light and overall created a grand window appearance.
Building Your Valance: After you have determined your measurements and cut your four wood pieces (1 front valance, two valance sides, 1 french cleat block) to size, I recommend you attach the sides of your window valance before you attach the french cleat block. It's easier to adjust your single french cleat wood block thickness if needed-- you want to make sure the sides and the french cleat are all even so the valance can sit flush against the wall. To construct, apply wood glue and secure the sides to the front valance piece with clamps and then screw together using your smaller corner braces. We attached four small corner braces on each side panel. Next attach the french cleat...
French Cleat: You will need one wood block that is 14 inches in length and the same depth as your valance (for me it was 3.5 inches). This will be the block that you use to attach your 12 inch french cleat. We used two different sizes corner braces (four total) to secure the wood block to the center of the valance. We then screwed on the french cleat to the center of the block. The french cleat I have linked below includes a level, so prop your valance upright while attaching the french cleat so you can utilize that level and ensure your valance will hang properly. Go ahead and attach the other side of the french cleat to your wall as well, making sure it is again center of the window frame and level.


Time for the fun part! Once your valance is fully constructed we can move to the quilt batting and fabric. First, I coated my entire valance with spray adhesive--the fumes are quite strong, be sure to do the spraying outside or somewhere very well ventilated. I then placed my quilt batting on top and pressed firmly on all surfaces. Next, I flipped my valance over, and started pulling the batting to the back so it was nice and taught as I used my staple gun to secure it. I kept my staples about 1 inch in from the edge of the valance and made my way around the entire valance so the quilt batting was secured at all edges. Lastly, I cut away any excess batting.
Now follow the same process to attach your fabric over the quilt batting. Depending on the size of your window valance, you made need to sew together two pieces of your fabric. A sewing machine is of course ideal, but if you don't have one you can easily get away with using an iron-on adhesive instead, but you'll need to be a bit more careful when you pull the fabric as you secure and staple it to the wood. I sewed together two panels of my fabric, making sure to align the pattern perfectly. I didn't worry about hiding my seam as I knew I would be adding a center ribbon detail that would ultimately cover the seam anyways. If you have two attached pieces such as mine, be sure to line up your fabric seam line with the exact middle of your valance. I did one staple at the top center and one at the bottom center to ensure I had everything nice and straight before I made my way around the valance entirely with the rest of the staples. I then removed any excess fabric with scissors so the back of my valance isn't bulky.
Next, I used fabric glue to attach my ribbon-- I could have sewn it directly onto my fabric before I attached it to the valance, but I opted for less sewing! I then stapled the ribbon to the back for extra security. Last but certainly not least, I added the cowboy rope detail along the edges of my ribbon. I didn't use any fabric glue, I simply stapled each rope end to the back of the valance.


Curtains: You have two options for curtains: you can add a curtain rod directly onto the back of your window valance, or you can put one directly within your window frame. At first, I had built the rod onto the back of my valance with this very simple and cost friendly curtain rod kit on Amazon. It worked great, I only swapped it later because I didn’t want curtains with my climbing toddler! So for safety’s sake, I later used these beautiful Annie Selke curtains instead (he can’t reach these!…yet), which required I attached directly to my window frame and not the valance.
Hang on the Range: Hanging with a french cleat is incredibly easy, but the valance is of course a bit big and awkward so it may take two sets of hands. Simply put the top of the french cleat down onto the bottom end and slide until it is centered.
Giddy up! We hope your valances turn out beautifully and you have fun with the project. You can find the full supply list/links below as well as more pictures for you to check out. We'd love for you to share your feedback and follow us at @nestledinnewcanaan!
Supply List:
MDF or plywood
Screws
10 smaller Corner braces, either 1 in or 1.5 in
Heavy Duty Stapler and staples, such as this one by Dewalt for $22
Quilt Batting - this Amazon link let's you buy by size!
Fabric of your choice! I bought a cowboy print on Patternbank and turned it into a Fabric on Spoonflower. You'll need enough excess material to securely wrap the fabric around your board (remember to account for spacing with quilt batting) and staple to the back of the valance.
If you want a central detail, pick out a ribbon or rope-- I combined two! I used this three inch navy ribbon and I already had this cowboy rope on hand from other projects I was working on for the nursery.
As an Amazon Associate, I earn on qualifying purchases.


Photos & Content: Maggie Bentley Designs