
Toy Takeover: Merging Pretty & Practical
Plastic and primary colors were a deal breaker for the pastel palette of our living room. I love watching my toddler learn, play, and make a delightful mess as he enjoys all his toys, but by the time he was two years old we had acquired so much plastic it felt like a hostile takeover of our living room. This parent company was desperate for a new strategy to organize the mess without hampering his fun. I browsed the many toy storage options, but all of them yielded to children's motif (again, with the primary colors), many were open-shelf concepts that did nothing to mitigate the visual effect of clutter, and most of the nicer more neutral pieces were wildly expensive. How could I merge pretty and practical?
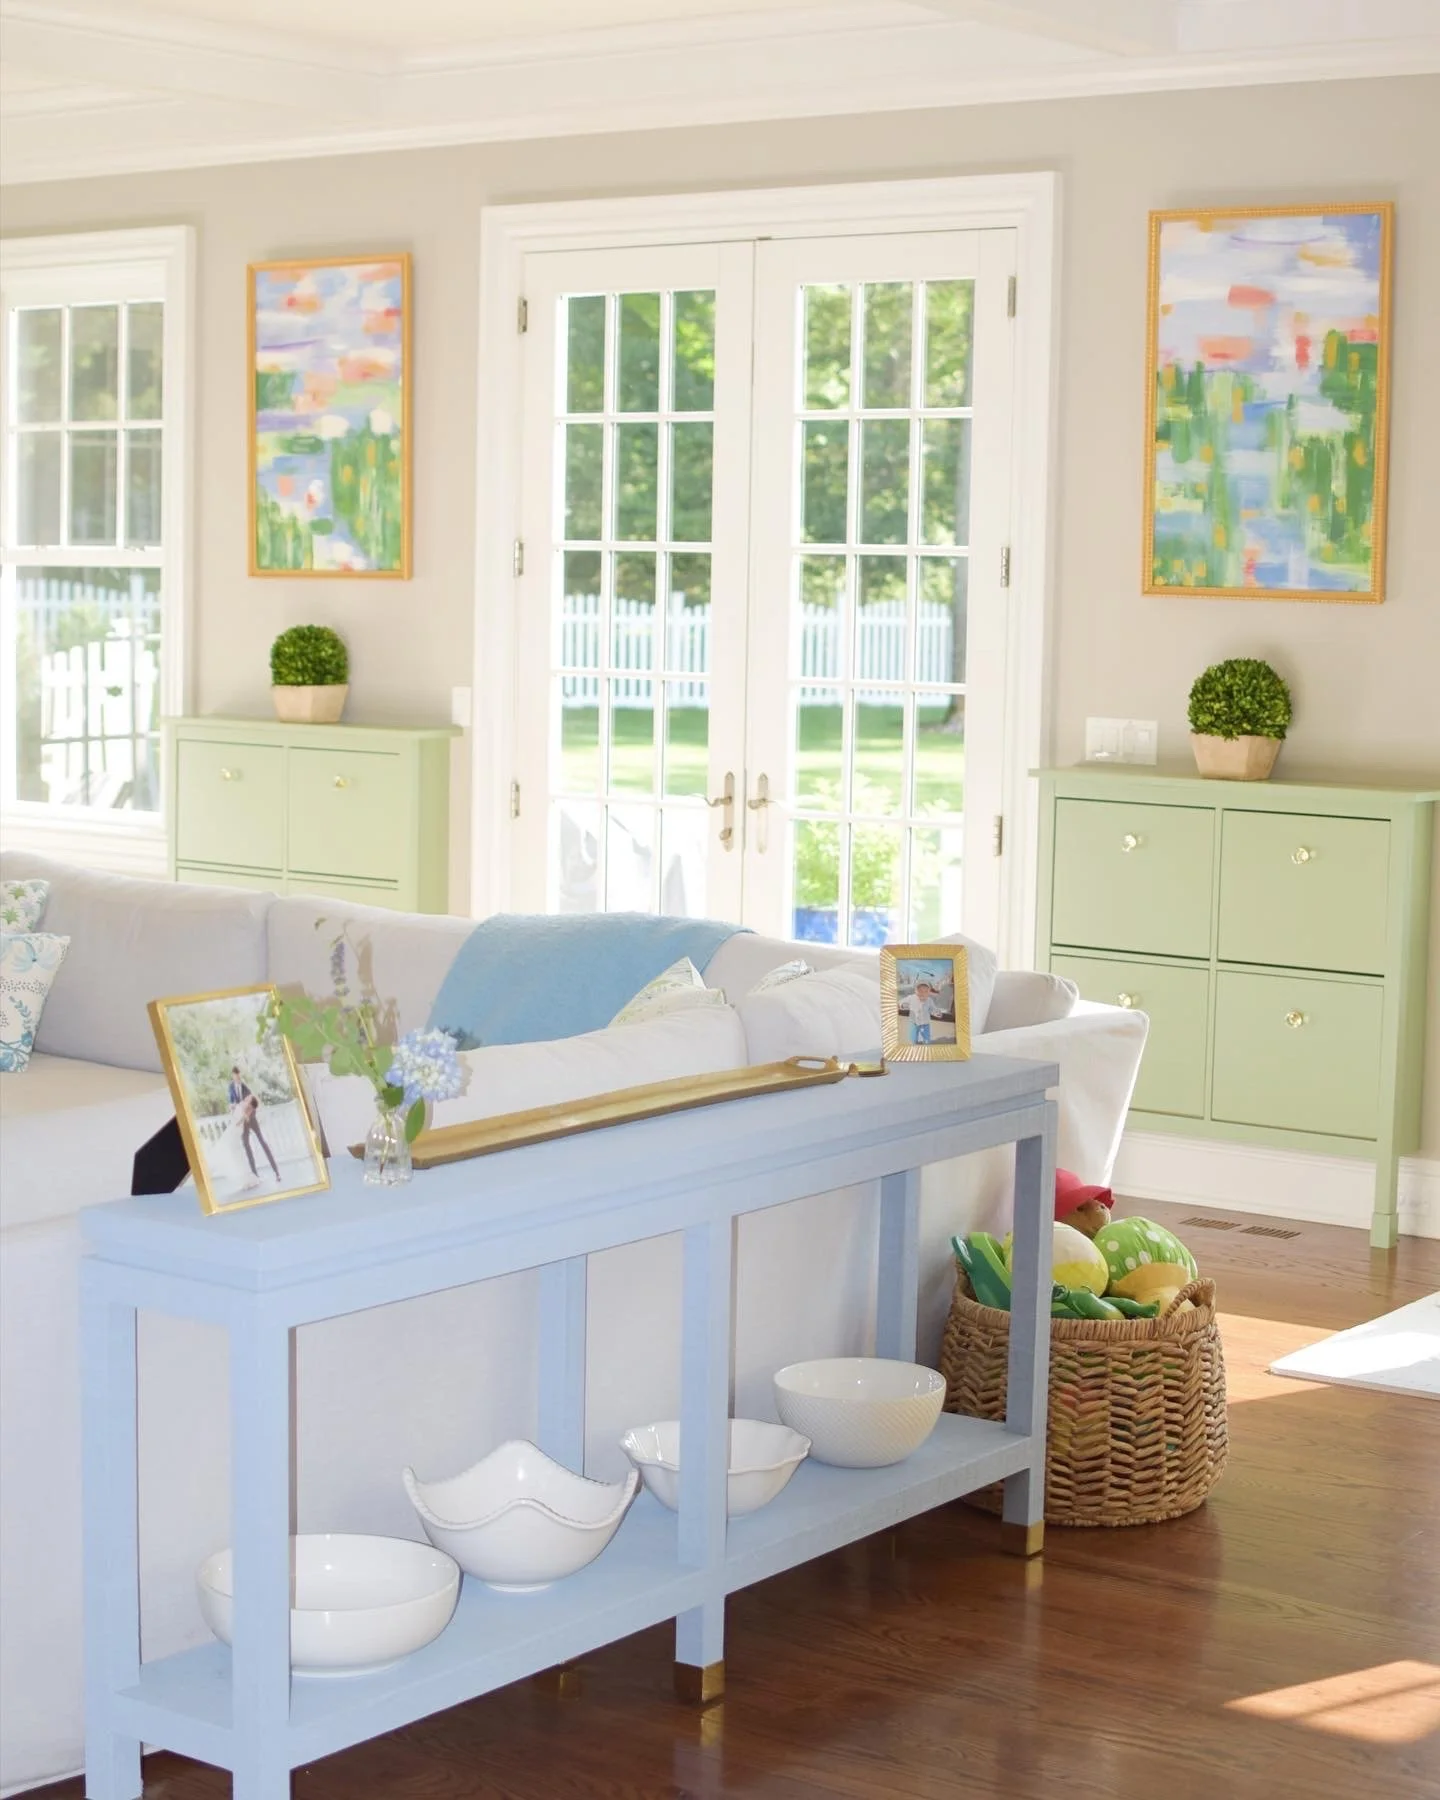
Enter the White Knight: Ikea.
We had an Ikea Shoe Cabinet ($179) that I had previously used in my first post-college apartment, and I thought with some creative reinvestments this piece could be a show-stopper.
The project was fairly straightforward (paint, lacquer, and swap out the drab ikea knobs for something chic), with the exception of one clever work-around. We have fairly high crown moulding, and the legs of the Ikea piece weren't long enough for the back of the cabinet to clear the moulding and lay flush against the wall. I found these furniture legs for $25 on Amazon.com and they provided the extra few inches of height I needed for the piece to clear my crown moulding. Depending on your wall, you might not need these at all. If you do, have fun browsing Amazon for all the different shapes available as there are tons of pretty options all in that same price-point. As you can see I went with a simple block leg look. They screwed in easily to the base of the Ikea cabinet and once the whole piece was painted the effect was flawless.
Paint Considerations: Chalk paint will save you the hassle of sanding the piece in advance, so I recommend using that as your base paint. I simply washed the cabinet, waited for it to dry, and then applied two coats of the chalk paint. All the hardware stores will mix whichever color you choose into the quart of Chalk paint-- I chose Behr's Rooftop Garden for my paint color. Worth noting, I didn't want to use a chalk wax for the finish on this project. Instead, I wanted a bit more shine and more durable finish (we know this piece is going to get lots of toddler wear and tear!) and so I opted for a Lacquer paint. The downside of Lacquer is the fumes, so be sure to put on a mask and paint in a well-ventilated area. I experimented with both brush-on and spray paint Lacquers to compare the two application processes and I preferred the spray paint. Both work great, so feel free to take your pick, but personally, I found the spray paint was faster, I had less drips, a more even coating, and I avoided brush stroke marks in the dried finish that tend to occur with the brush-on lacquer. Be sure to keep the spray moving consistently and don't apply too thick.
Here is the full list of supplies:
Rustoleum Lacquer Brush-On Paint (Crystal Clear) or Rustoleum Lacquer Spray Paint (Clear, High Lustre)
Wooster Brush, if you opt for brush-on Lacquer instead of spray-on
Amazon Solid Wood Furniture Legs (if you need more height)
Superio 4 Qt Storage Bins fit the cabinet perfectly, you'll need 8
Before and After shots below, please follow along and share your project results on @nestledinnewcanaan!
As an Amazon Associate, I earn on qualifying purchases.


All Photos are property of Maggie Bentley